
Industrial grills are the backbone of countless commercial kitchens, from bustling restaurants to large-scale food production facilities. Over time, these hardworking appliances face the inevitable challenge of accumulated grease and grime. Layers of stubborn residue can dull their appearance, reduce efficiency, and even pose risks to health and safety. Tackling years of grease on an industrial grill isn’t just about improving its look—it’s about restoring it to optimal functioning and ensuring compliance with hygiene standards. Let’s dive into essential steps and top techniques for industrial grill restoration.
Understanding the Challenge: Why Industrial Grills Accumulate Grease
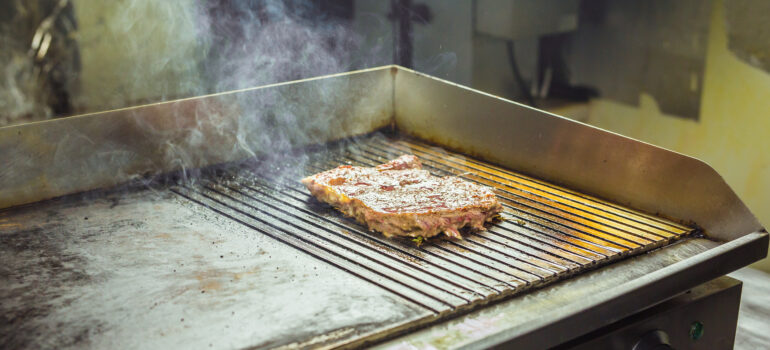
Industrial grills work tirelessly, supporting hours of daily cooking under high heat. Whether you’re grilling burgers, vegetables, or proteins, airborne grease particles and food residue naturally accumulate over time. The problem only worsens without regular cleaning, as hardened grease layers seem impervious to most scrubbing attempts. This residue can:
- Affect the grill’s heat distribution, leading to inconsistent cooking.
- Accelerate corrosion if moisture interacts with the built-up grease.
- Pose a fire hazard, as grease is highly flammable.
- Create health risks if food comes into contact with unclean surfaces.
Understanding the root of the issue sets the foundation for the right restoration approach.
Step 1: Preparation is Key
Before jumping into the deep-cleaning process, proper preparation ensures safety and efficiency. Here’s how to set yourself up for success:
- Turn Off the Grill and Disconnect Power
Safety comes first. Disconnect the grill from any gas or electrical sources. Ensure all surfaces have cooled down before proceeding. - Gather Essential Tools and Materials
Industrial-grade cleaning requires industrial-grade tools. Stock up on items like:- Commercial degreasers and grill cleaners.
- Heavy-duty scrub brushes and grill scraper tools.
- Non-abrasive scrubbing pads to avoid damaging the grill’s surface.
- Microfiber cloths for rinsing and drying.
- Wear Protective Gear
Industrial degreasers can be harsh on skin and eyes. Always wear gloves, safety goggles, and protective clothing to avoid harmful chemical exposure.
Step 2: Deep Cleaning the Grill Grates
The grill grates endure the most direct exposure to food and oils, so they require focused attention. Follow this process:
- Pre-Soak in Hot Soapy Water
Detach the grates and soak them in a sink or tub filled with hot, soapy water. This helps loosen hardened grease and food particles. - Scrape Stubborn Residue
Using a grill scraper, carefully remove any stuck-on grime. For safety and efficiency, scrape in one direction, ensuring you don’t damage the grates. - Apply Degreaser for Stubborn Buildup
If hot water and soap aren’t enough, apply a commercial degreaser directly onto the grates. Allow it to sit for a few minutes to penetrate the deepest layers of grease.
Step 3: Restoring the Grill Interior
The interior surfaces of the grill also endure grease buildup, especially in hard-to-reach crevices. Here’s how to restore them:
- Remove Loose Grease and Debris
Using a vacuum or cloth, clear out any loose grease chunks or leftover food particles. - Degrease Interior Walls and Burners
Apply a degreaser to interior walls and burner covers. Use a scrub brush to clean thoroughly, paying extra attention to areas near the exhaust. - Wash and Rinse Interior Parts
If possible, remove interior components and wash them in soapy water. Rinse and dry completely before reassembly. - Polish Stainless Steel Surfaces
If your grill features stainless steel components, restore its shine with a specialized stainless steel cleaner. Always scrub or polish along the grain for the best results.
Step 4: Addressing the Grill’s Exterior
Don’t overlook the exterior surfaces of your grill, as a polished outer appearance enhances professional presentation.
- Wipe Down Dust and Grease
Start by wiping away loose dust and grime with a damp cloth. - Use Non-Abrasive Cleaners
Apply a cleaner suitable for your grill’s surface material to remove grease streaks or discoloration. - Shine and Protect
Use a polishing agent as the final step to add a protective layer that resists future grease buildup.
Step 5: Regular Maintenance Keeps Grills Running Smoothly
Restoring years of grease on an industrial grill is a demanding process, so preventative measures are key to maintaining your efforts. Implementing a routine cleaning schedule minimizes future buildup, saving you time and money. Consider the following tips:
- Perform Weekly Deep Cleans
Dedicate time each week to thoroughly clean grates and key interior surfaces. - Install Grease Traps
If your grill lacks a grease trap, consider retrofitting one to collect excess grease efficiently. - Train Staff on Proper Cleaning
Ensure all kitchen staff understand daily and monthly cleaning procedures. Consistency across shifts makes a huge difference.
Conclusion: Restore Functionality, Safety, and Pride
Years of grease can weigh heavily on the performance and safety of your industrial grill. However, with the right tools, techniques, and routine maintenance, you can restore your grill to its prime condition. Not only does this improve operations and health compliance, but it also showcases your commitment to professional standards. Remember, a clean grill isn’t just functional—it’s a reflection of your attention to detail and care for your work environment.